Trivia events are a fun and interactive way to engage your team or community. Whether you’re hosting a team meeting, an onboarding session, a social gathering, or a large-scale community event, Trivia helps everyone participate, compete, and connect in real time.
This guide explains every step of creating and running a Trivia event in your Gamespace — from scheduling and uploading your questions to launching and managing the event.
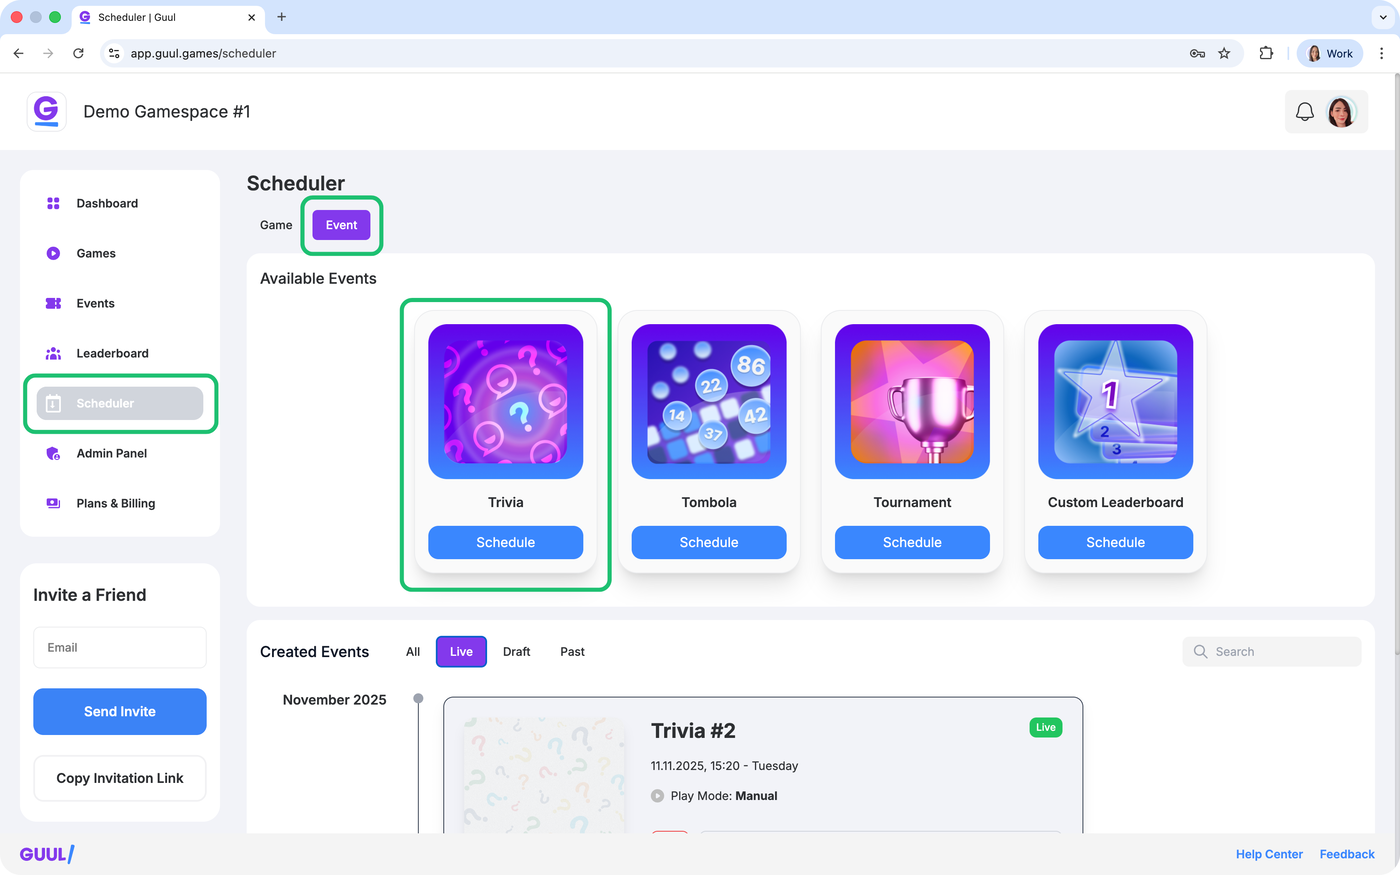
Accessing the Scheduler
To create any event, navigate to:
Dashboard → Scheduler → Event
Inside the Events tab, you will see all available event types:
Trivia
Tombola
Tournament
Custom Leaderboard
You will also see all previously created events under Created Events.
To create a new Trivia event, click Schedule under the Trivia card.
Setting Up Your Trivia Event
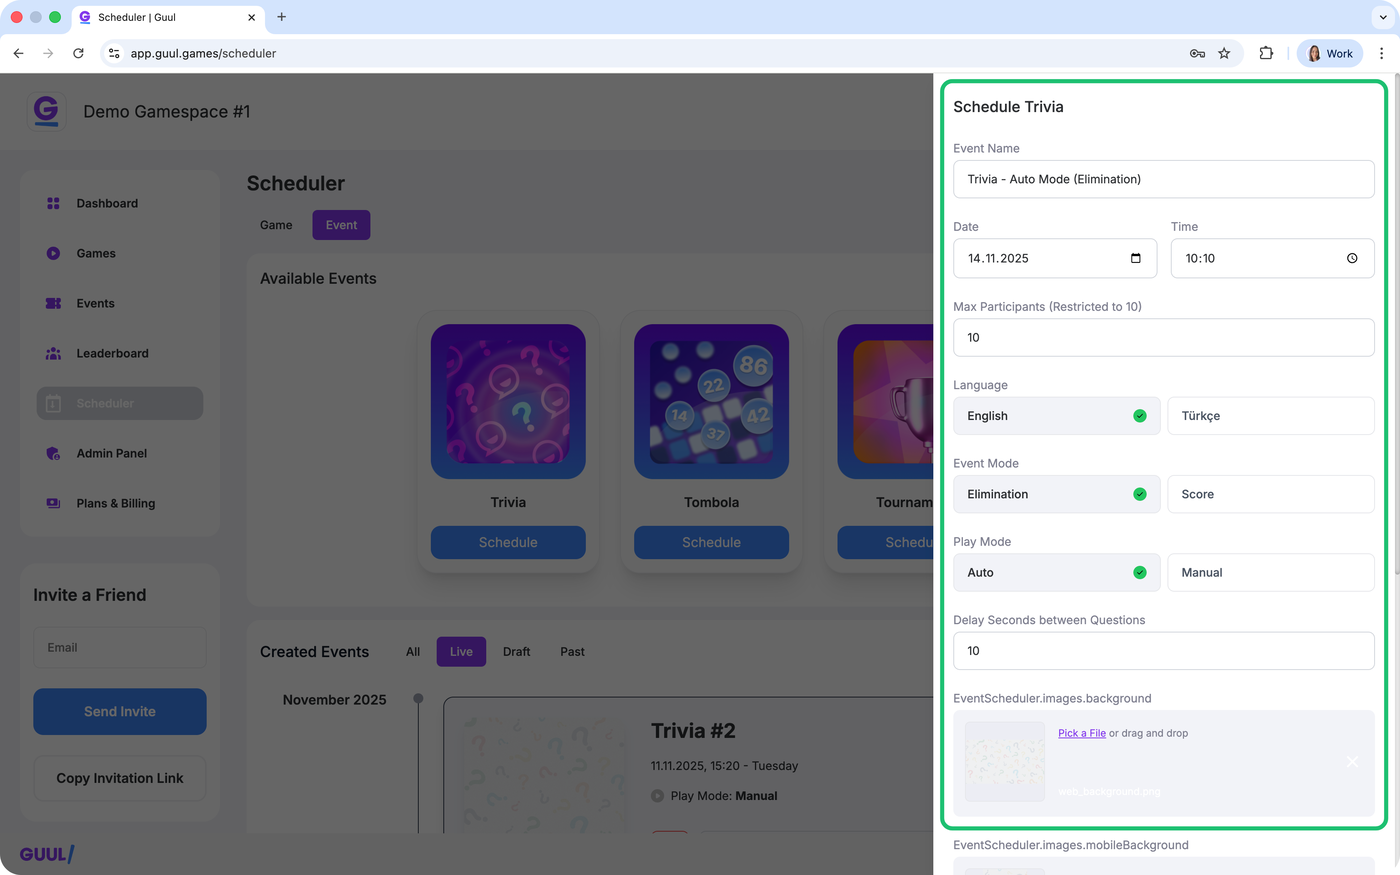
After clicking Schedule, a setup module will appear. Follow the steps below:
Event Name
Give your Trivia a clear, recognizable name.
Examples:
“Friday Fun Trivia”
“Marketing Team Quiz”
“Company Kickoff Trivia”
Date & Time
Choose when your Trivia will start.
Max Participants
On the Free plan, Trivia events are limited to 10 participants.
For larger events, teams, or company-wide activities, contact us at sales@guul.games.
We use a token-based system for events with higher participant limits.
Language
Select your event language:
English
Turkish
If you require a different language, you can reach out to our team.
Event Mode
Choose how the Trivia should function:
Elimination Mode
Participants continue only if they answer correctly.
You can set the time allowed to read and answer questions.
Anyone who gives a wrong answer or doesn’t respond in time is eliminated.
The game continues until only one winner remains.
Score Mode
Participants earn points for each question.
No elimination, everyone plays until the end.
Reading and answering time can be customized per question.
Live rankings are shown after each question.
Final scores determine the leaderboard.
Play Mode
The only difference between Auto and Manual mode is this: in Auto mode, questions move forward automatically based on the delay you set, while in Manual mode, the admin advances each question manually.
Delay Between Questions
Set how many seconds should pass between questions.
This delay applies only to Auto mode.
Branding
You can upload custom images to brand your event:
EventScheduler.images.background — Background image for web (horizontal format)
EventScheduler.images.mobileBackground — Background image for mobile devices (vertical format)
EventScheduler.images.logo — Your company logo
These appear during the event for participants and help customize the experience.
Upload CSV File
Your Trivia questions must be uploaded using a CSV file.
Each row in your CSV represents one trivia question.
The required columns are:
QuestionText — The full question
CorrectAnswerId — The number (1–4) of the correct answer
Answer1Text — Option 1
Answer2Text — Option 2
Answer3Text — Option 3
Answer4Text — Option 4
You can download the ready-made CSV template from the setup screen.
Just replace the sample content with your own questions and answers.
Once your questions are added, upload your CSV file.
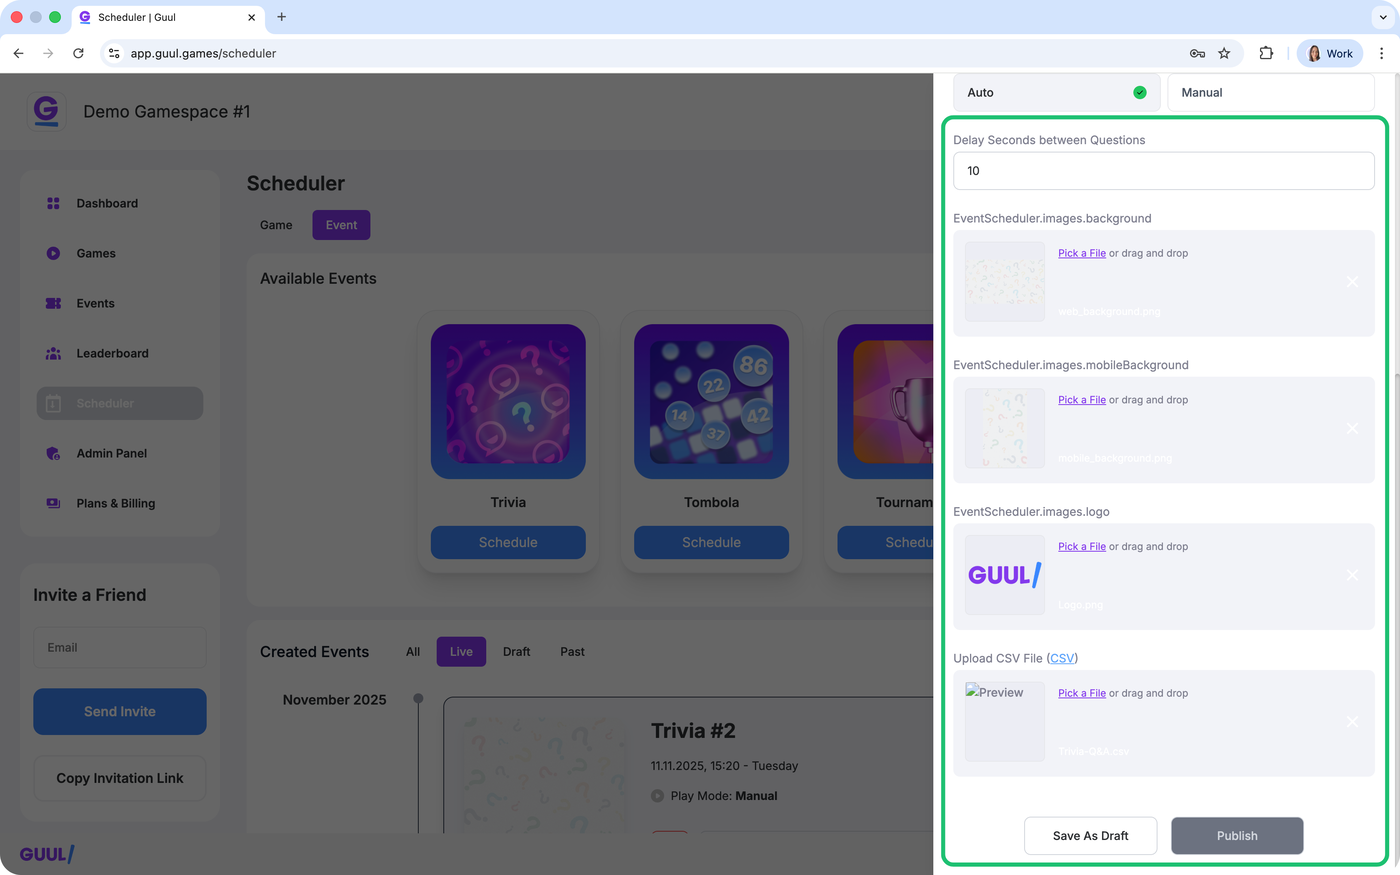
Save or Publish
You have two options:
Save as Draft — Continue editing later
Publish — Make the Trivia officially scheduled
After publishing, your event will appear in the Events page for you to manage, and gamespace members will be able to see it on their side.
👉 For how users join Trivia events, see the “How to Join a Trivia Event (User Guide)“ guide.
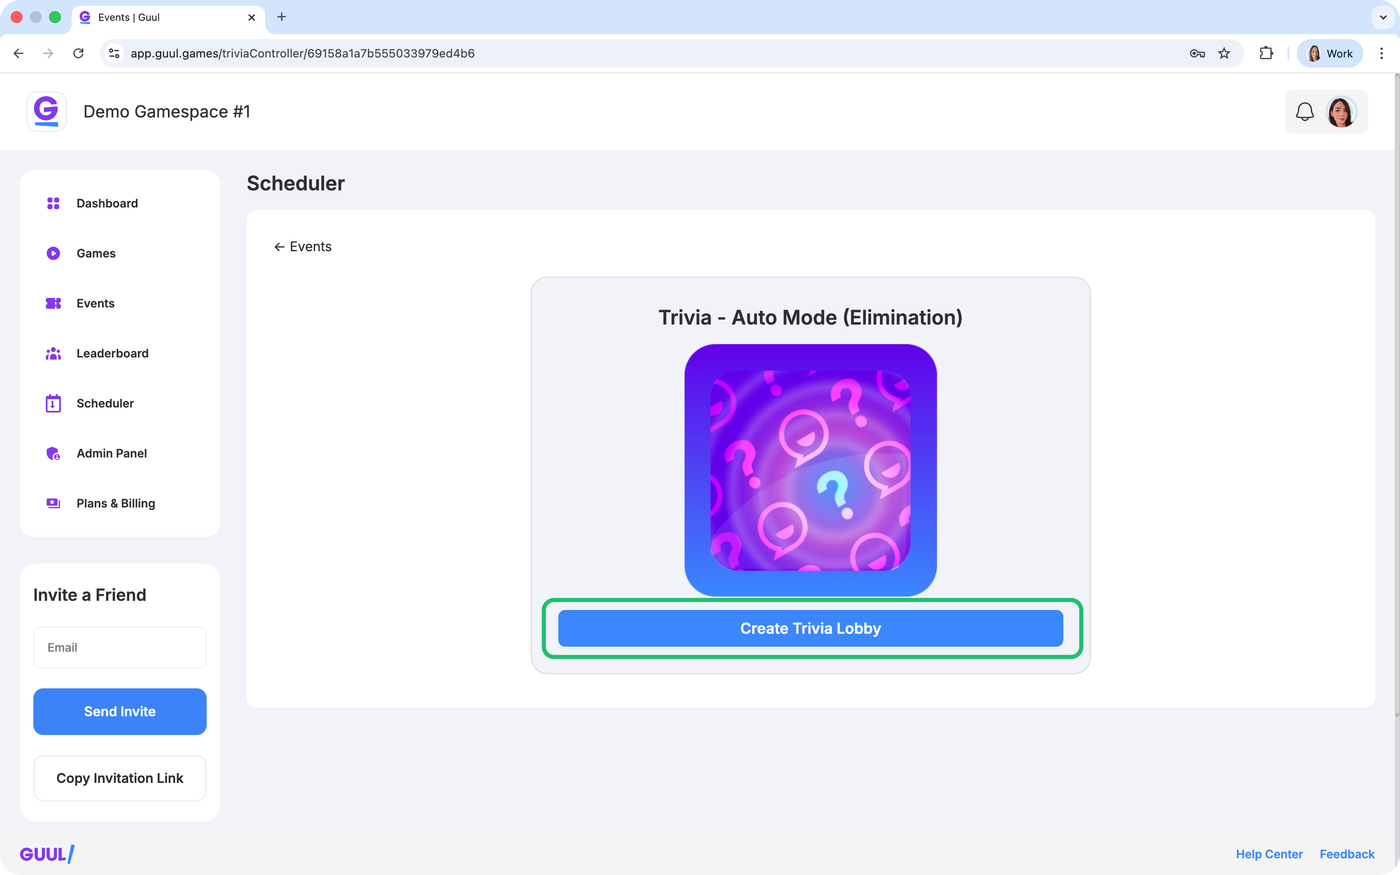
Launching the Event
Once your event is published, you will see it under the Events page.
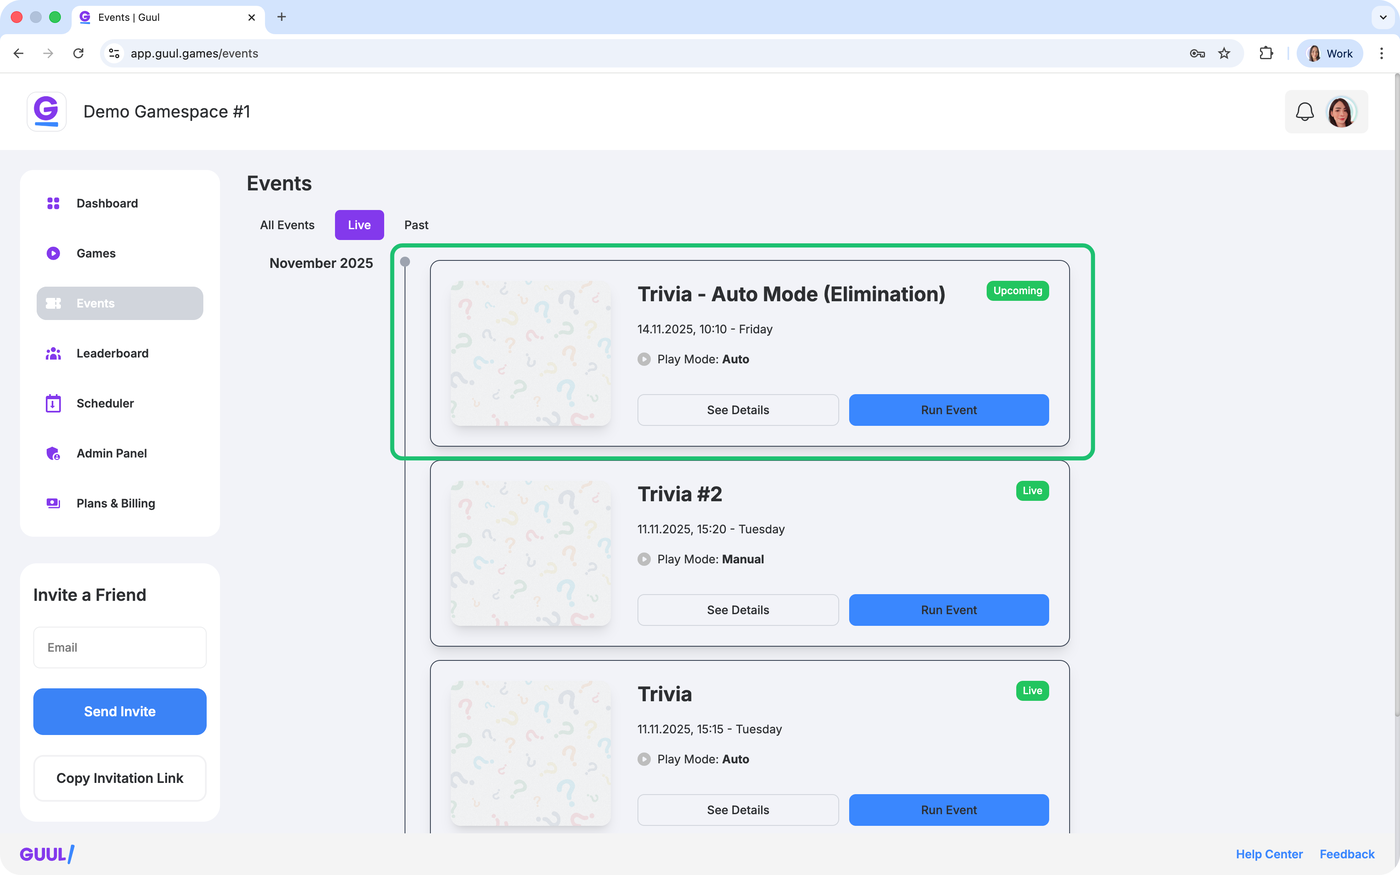
To launch your Trivia when the scheduled time arrives, the admin must:
Create the Trivia lobby
Click Start Game (required for both Auto and Manual mode)

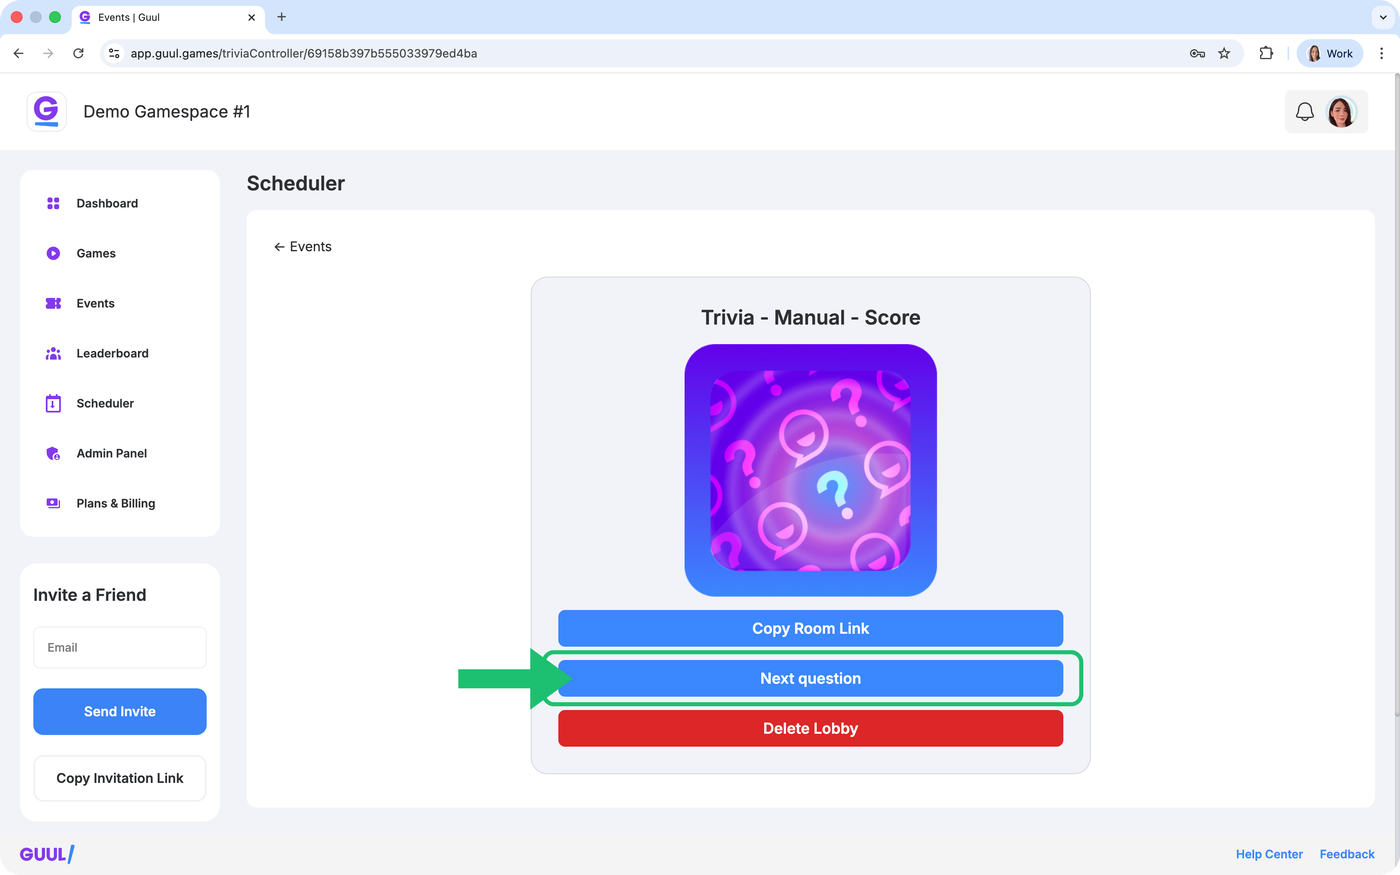
Inside the lobby, you will see two additional buttons:
• Copy Room Link — Share this link with your participants in any channel you want.
• Delete Lobby — Removes the lobby if you need to cancel the event.
That’s it — once you click Start Game, the event officially begins.
Managing the Event
Once the game starts, questions will appear one-by-one for all participants.
Mode Differences
The only difference between Auto and Manual mode is:
Auto Mode: Questions advance automatically based on the delay you set.
Manual Mode: The admin manually moves to the next question.
After each question, the live leaderboard appears so everyone can see their standings.
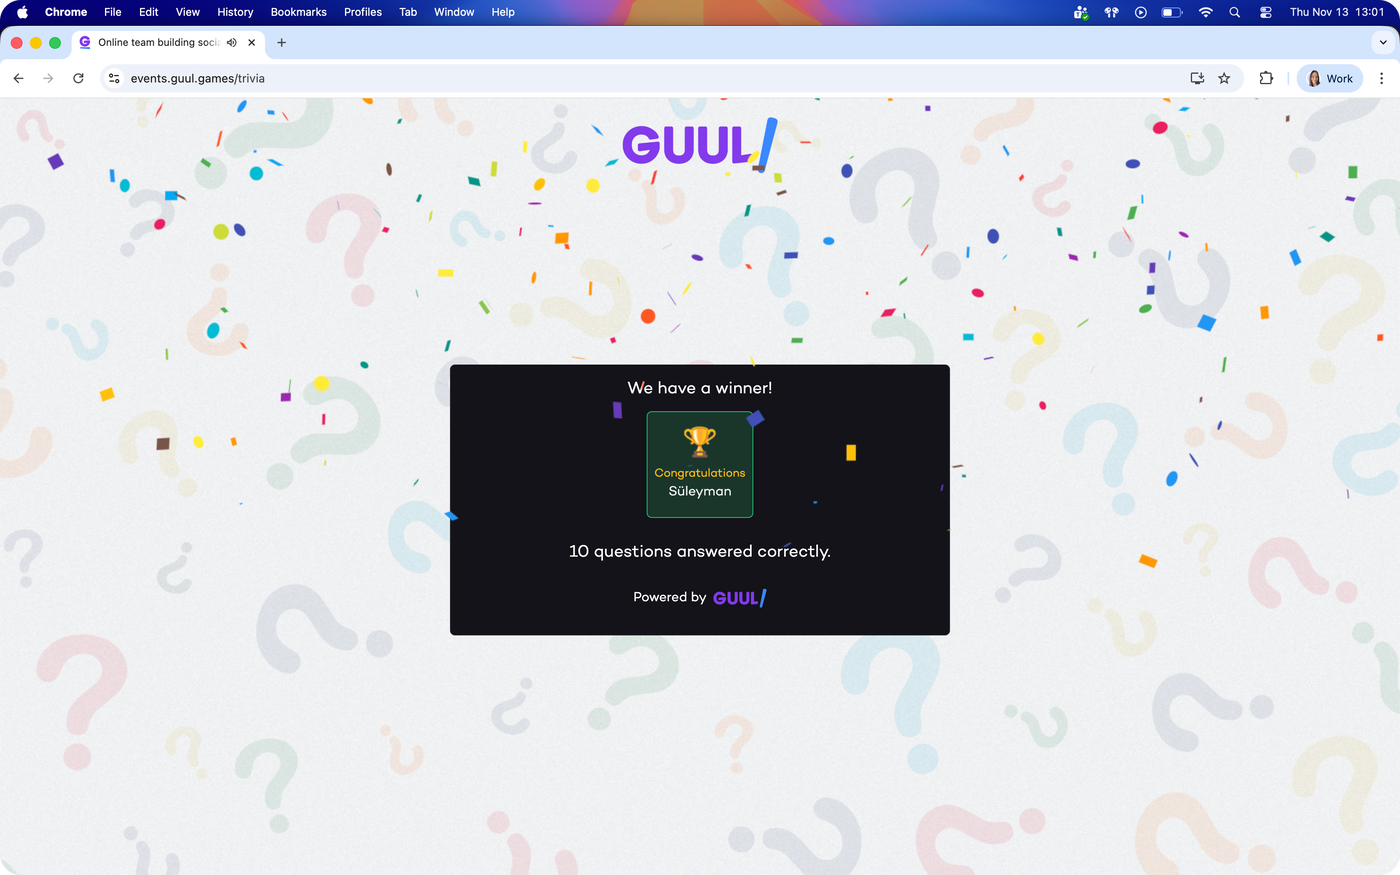
Event Flow: Elimination Mode
Participants continue only if they answer correctly.
Wrong or missing answers result in elimination — but eliminated players can still watch the game.
If the event has 10 questions but only one player remains after question 7, the event ends early and that player is the winner.
If multiple players survive until the last question, the winner(s) are the ones who answered all questions correctly.
This mode determines the last remaining player(s).
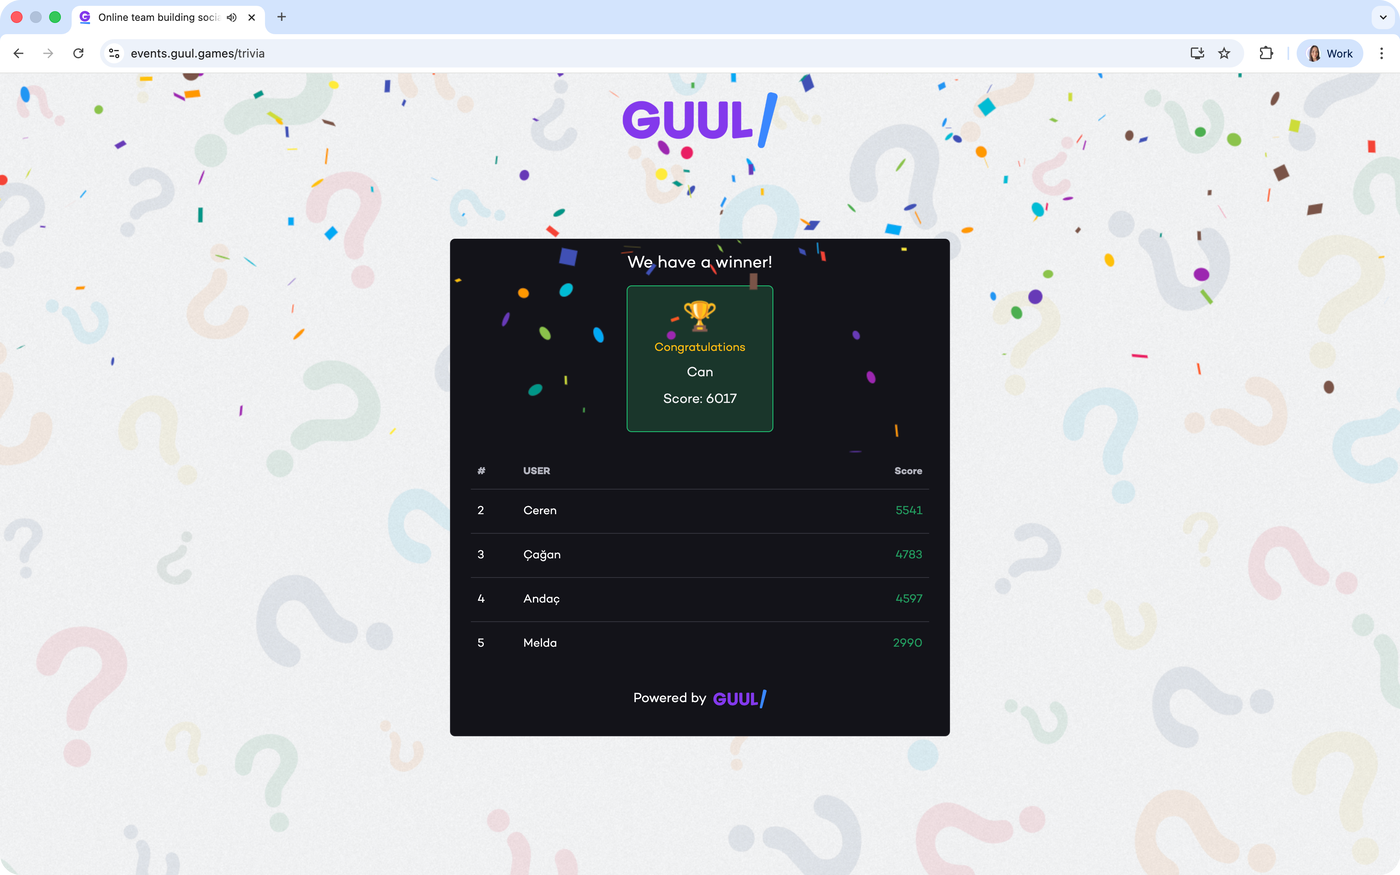
Event Flow: Score Mode
Participants earn points based on how fast they answer correctly.
Wrong or missing answers give 0 points, but players are not eliminated.
Everyone continues until the end of the event.
After the final question, total points are calculated and the leaderboard shows the final rankings.
This mode determines the highest-scoring player.
Your Trivia event is now fully set!
Once you publish it and share the event link, your team or community can join from any device.
If you want the user-side instructions, see:
